
Portable Ice Maker for a Small Apartment Kitchen
How a countertop unit actually fits a plumbing-free galley kitchen, from counter inches to venting gaps to where it lives when you are not using it.
Key takeaways
- A portable ice maker needs no water line, so it fits a renter's plumbing-free kitchen.
- Measure lid clearance and venting gaps, not just the base footprint, before you buy.
- Leave about four inches behind the compressor or the ice comes out soft and slow.
- Run two batches on a new unit and toss that ice to clear the plastic taste.
- Drain and dry the unit fully before off-season storage to prevent musty smells and mold.
My friend Dana rents a one-bedroom with a galley kitchen that is maybe four feet of usable counter. She wanted iced coffee at home without buying bags of ice every three days, and a built-in ice maker was out because there is no water line and her lease forbids drilling anything.
So we set up an apartment portable ice maker together on a Saturday, measuring as we went. It worked, but the placement mattered more than either of us expected.
Here is exactly how it went, including the spot we got wrong the first time and had to redo.
The kitchen we were working with
Dana’s counter runs from the stove to the sink with a narrow strip on the far side, about 11 inches deep and 30 inches wide. There is one duplex outlet above the counter, already sharing space with a toaster and a phone charger.
The machine we chose was a Silonn countertop model, a common bullet-ice unit that pulls around 100 watts while freezing and makes roughly 26 pounds of ice per day if you keep feeding it water. Its footprint is close to 8.7 by 12 inches, so on paper it fit the narrow strip with room to spare.
On paper. The real constraint was not the base of the machine, it was everything around it.
Bullet-style portables like the Silonn, Euhomy, and Igloo lines do not need a drain or a water line. You pour water into a reservoir, and the melt drips back down to be refrozen. That is what makes them work for a renter with no plumbing.
Measuring counter real estate before you buy
The mistake people make is measuring only the width and depth of the unit. You also need clearance for the lid to open and space to reach the reservoir with a pitcher.
Most of these machines fill from the top, so the lid swings up. Dana’s has a cabinet directly above part of the counter, and the lid would have hit it in the obvious spot near the outlet. We lost about six usable inches of counter to that overhead cabinet without realizing it until the lid thunked into wood.
If you want a fuller breakdown of how these dimensions vary by model, I compared several in the piece on countertop ice maker footprint and weight, which is worth a look before you commit counter space.
| Space to measure | Why it matters | Rough number |
|---|---|---|
| Base footprint | Does the unit sit flat | 9 x 12 in typical |
| Lid clearance above | Top-loading lid swing | 10-14 in overhead |
| Side and rear gap | Compressor venting | 4-6 in each vented side |
| Reach room | Filling with a pitcher | Arm’s length to reservoir |
Venting clearance around the compressor
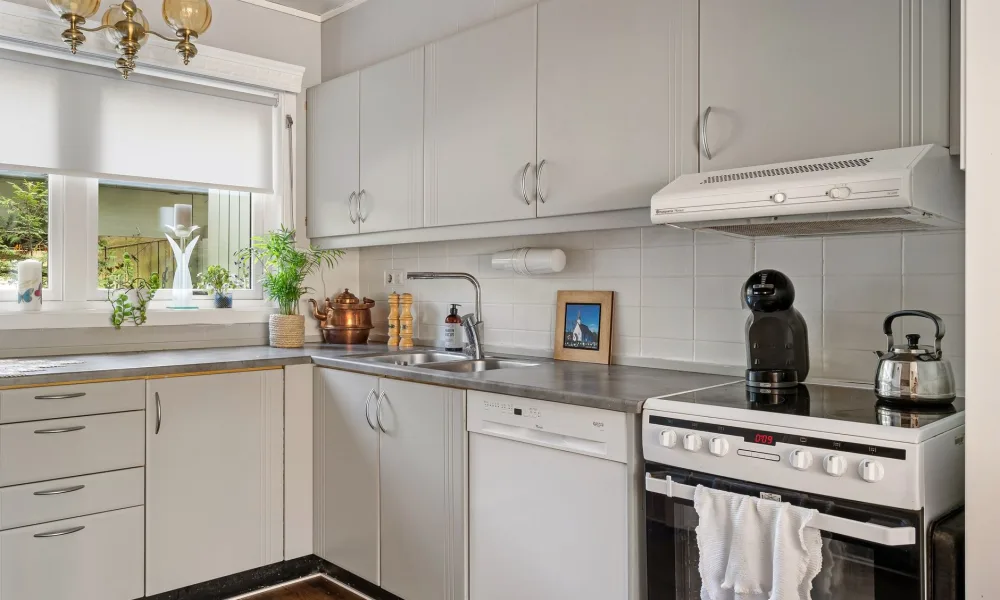
This is the part most first-time buyers skip, and it is the one that actually protects the machine. A portable ice maker has a small compressor and a fan that dump heat out the back and sides. Push it flush against a backsplash and that heat has nowhere to go.
When we first slid Dana’s unit into the corner by the sink, it was tight against two walls. Within an hour the ice was coming out soft and the cycles were running long, because the compressor was fighting its own trapped heat.
We pulled it out to leave about four inches at the back and one side. Cycle times dropped back to normal, roughly 12 to 15 minutes a batch. If you ever notice slow or mushy ice, poor airflow is the first thing to check, and it overlaps with the causes I list in the guide to countertop ice maker daily output.
Never box one of these into a cabinet or a tight nook with no back gap. A trapped compressor runs hot, makes weak hollow ice, and shortens its own life. Airflow is not optional.
Outlets, power draw, and shared circuits
These machines are gentle on power compared to a kettle or a toaster. Dana’s unit peaks near 100 to 120 watts during the freeze cycle, which is a small fraction of what the kitchen circuit can carry.
The catch in an apartment is the shared circuit. Small kitchens often run the counter outlets, the microwave, and sometimes the fridge on one 15-amp line. Stacking the ice maker on the same outlet as a 1,500-watt toaster oven at breakfast is how you trip a breaker.
We plugged the ice maker straight into the wall, not a cheap power strip, and kept the toaster on the opposite outlet. If you want the full numbers on running watts and startup surge, I broke those down in the article on portable ice maker power draw.
A quick outlet checklist
- Plug the unit directly into a wall outlet, not a daisy-chained strip
- Keep high-wattage appliances on a separate outlet or circuit
- Leave the cord with a little slack so the unit can sit away from the wall
- Confirm the outlet is a GFIC type near the sink, which most modern kitchens have
Water, and why the first batches taste like plastic
Dana filled the reservoir from the tap and ran it. The first two batches had a faint plastic smell, which is completely normal on a new machine.
We ran two full cycles and threw that ice away, then the taste cleared up. This happens with almost every new unit as the fresh plastic and tubing get flushed. I go deeper on the fix in the piece on why your first batch tastes off, and it is worth doing before you serve anyone a drink.
If your building has hard water, and a lot of apartments do, mineral scale will build up faster than you expect. You can check your local water hardness through the USGS water hardness resource, which helped Dana realize her area runs on the hard side and she would need to descale more often.
The machine is only as good as the water you feed it, and the counter you set it on.
Storing it when you are not making ice
This is the reason a portable makes sense in a small apartment: you do not have to keep it out. Dana uses hers heavily in summer and barely at all in winter, so it needs an off-season home.
Before storing, drain it fully. There is a plug on the underside of most units, and any water left inside will grow a musty smell and can breed mold in the reservoir. Leave the lid propped open for a day so the inside dries out completely.
Dana’s unit weighs about 20 pounds, so it lives on the top shelf of her pantry between October and April. When she brings it back out, she runs one cleaning cycle with a water and vinegar mix, dumps that ice, and it is ready. Keeping the water clean matters year round, and the same hygiene habits that keep drinking water safe apply here, which the CDC healthy water guidance lays out plainly.
Store the drained unit with a clean dry cloth inside the reservoir and the lid slightly ajar. It keeps the interior from getting that closed-up smell that ruins the first batch next season.
Was it worth it for a renter
For Dana, yes, easily. She stopped buying bagged ice, the machine paid for itself in a couple of summers, and it packs away when she does not need it. The whole thing rests on getting the setup right, which is the same principle behind how countertop ice makers work in the first place.
Making the call for your own kitchen
If you rent a place with no water line and a sliver of counter, a portable ice maker is one of the few appliances that genuinely fits that life. The unit itself is the easy part. The wins and losses come from where you put it: enough overhead room for the lid, four inches of breathing space behind the compressor, an outlet that is not fighting your toaster, and a shelf where it can hibernate when the weather turns.
Measure twice, leave the machine room to breathe, and drain it before it goes into storage. Do that and a 30-inch strip of galley counter can quietly make you 20-odd pounds of ice a day, no plumber and no landlord conversation required.
Frequently asked questions
No. Portable countertop units use a reservoir you fill by hand, and the melt drips back down to be refrozen. That is the whole reason they suit renters with no water line and no permission to drill.
The base is usually around 9 by 12 inches, but you need more than that. Leave room for the top lid to swing open and about four inches behind for venting, so plan for roughly a 16 by 16 inch working zone.
The machine itself only pulls around 100 to 120 watts, which is low. The risk is sharing a circuit with a toaster or microwave, so keep high-wattage appliances on a different outlet and plug the ice maker straight into the wall.
The most common cause in a tight kitchen is poor airflow around the compressor. If the unit is jammed against a wall, its trapped heat lengthens cycles and weakens the ice, so pull it out a few inches and let it breathe.
Drain it completely through the bottom plug, wipe the reservoir dry, and leave the lid propped open for a day. Store it with a clean dry cloth inside so the interior does not develop a musty smell before the next season.

About the Author
Madhu Malhotra
Madhu Malhotra reviews nugget ice makers, countertop units, and portable freezers with a focus on real world durability. Over more than ten years of testing home ice machines she has learned which build details actually hold up, how to keep water lines clean without harsh chemicals, and what the marketing brochures quietly leave out. Her write ups aim to save readers a return trip and a wasted weekend.
Related guides

Why Countertop Ice Makers Make Hollow Bullet Ice
The open center in your bullet ice is a design feature, not a defect, and here is how to tell normal hollowness from a real problem.
Countertop Ice Maker Daily Ice Output Explained
Why the 26 lb per day number on the box overpromises, how many batches you really get per hour, and how to size ice to your household.

Portable Ice Maker for a Boat Galley or Dock
A weekend running a countertop unit in a cabin galley taught me what actually matters for ice afloat, from power to motion to refills.